Installation Home Security Starter Set
Starter Set contents
1x Base Station
1x Keypad
1x Photo Motion Detector
1x Smart Plug
1x Contact Sensor
1x Key Fob
Installation
This example house shows how Home Security can be set up at your home. You can set up the service for your own needs.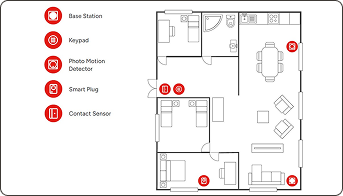
Note:
An active internet connection is required for installation.
Tip:
Already installed My Sunrise?
If not, simply select "New to Sunrise? Get started" in the My Sunrise login.
Your username is either your email address, mobile number, customer number or landline number.
Open the app and tap "I am the primary resident".
Log in to your account with your My Sunrise details. Set-up is easy – the app will guide you through the process step by step.
The Base Station is the control centre and the alarm of your home security solution. With the app, set-up is quick and easy.
Unpack the Base Station, get the cables ready and log in to the app.
Tap "Set up your Base Station" in the app and then tap "Get started" to begin.
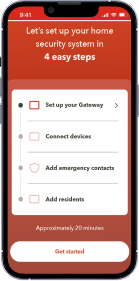
Follow the instructions in the app. The app guides you through all the steps necessary for setting up Home Security.Connect the Base Station to your Internet modem, plug in the power supply and turn on the base station.

The app guides you through all the steps necessary for setting up Home Security.
Activate emergency power supply:
Remove the cover plate from the underside of the Base Station and set the switch to "ON" have the cables ready and log in to the app.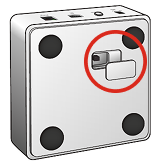
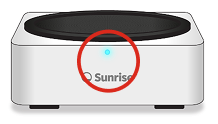
Wait until the Base Station LED flashes green – the system is then ready for use.
Tip:
The Base Station needs an active Internet connection to work.
Use the ethernet cable shipped with your Base Station to connect to your Internet modem. If the cable is too short you can use a longer one; we recommend a CAT5E ethernet cable.
Decide on the best locations for your (1) Keypad, (2) Photo Motion Detector, (3) Contact Sensor and (4) Smart Plug. You need the (5) Key Fob to control the devices.
Once you have decided on the best positions, you can attach the devices quickly and easily with the adhesive strips provided.
If you would rather mount the accessories with screws, please follow the instructions in the individual device manuals.
Note: The adhesive strips can only be used once and the surfaces must be clean, grease-free, flat and smooth.
1. - Keypad
The Keypad is used to arm and disarm your alarm. We recommend placing it in the hallway near your main entrance.
To arm the alarm system, enter your PIN and then press:
the Shield button
for Away Mode orthe House button
for At Home Mode
Please note that the default PIN is 1234. You can assign a custom name to the Keypad and change the PIN in the app.
Installation steps:
1. Remove the plastic tab on the side of the Keypad to activate the battery.
2. Place the Keypad near the doorway that you use to enter and leave your home.
3. Choose a location that is not visible from the outside.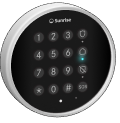
Inactive Mode
Away Mode
Home Home
Activate SOS
2. - Photo Motion Detector:
The Photo Motion Detector recognises motion together with heat. Place the detector in an area that is potentially vulnerable to intruders, for example, in rooms with direct access to the outside.
Installation steps:
1. Remove the plastic tab on the back of the detector to activate the battery. The LED light will then flash a few
times.
2. Mount the Detector in a place that an intruder is most likely to pass through – ideally in a corner of the room.
3. Install the detector at a height of 2.3 to 2.5 metres.
4. Make sure that the detector is not obscured by furniture or curtains.
5. Do not point the detector directly at doors that are secured with door or window sensors.
6. Avoid direct sunlight and do not place the detector near heat sources such as open fires, boilers, steam or radiators.
7. Do not place the detector in front of or opposite windows or moving objects such as curtains.
8. Make sure that pets cannot get close to the detector, for example by climbing on furniture.
Detection zone and pets
The sensor has a horizontal detection angle of 90 degrees and detects motion at a range of up to 12 metres. It also does not react to pets that weigh less than 25 kilograms.
Height of installation
Between 2.3 m and 2.5 m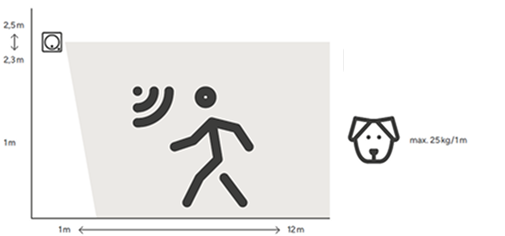
Important: The Photo Motion Detector can only be installed indoors.
3.- Contact Sensor:
Attach the Contact Sensor to a door or window. As soon as the door or window opens, the magnetic contact breaks the circuit and the alarm is triggered.
Installation steps:
Remove the plastic tab on the side of the sensor to activate the battery. The LED will then light up.
Choose a door or window that is potentially vulnerable to break-ins.
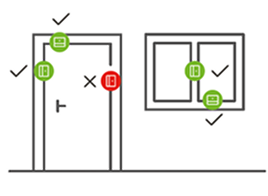
The sensor consists of two parts: the larger part contains the sensor, the smaller part the magnet.
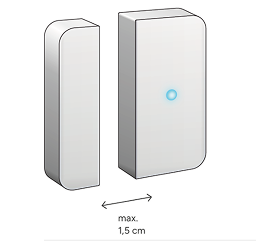
Place the magnet as close as possible to the sensor – the distance between the two must not exceed 1.5 centimetres. Attach the sensor to the door or window frame and mount the magnet directly on the door or window.
Tip: If you’ve bought additional contact sensors, add and configure them one at a time with the Home Security app.
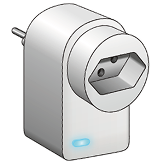
4. - Smart Plug:
Plug the Smart Plug into a socket. It can be controlled both via the button on the device and via the app. It can also be activated and deactivated automatically according to an individually configurable weekly schedule or using intelligent routines – both can be set up easily in the app.
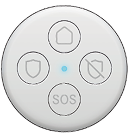
5. - Key Fob:
With the Key Fob, you can arm or disarm the alarm system at the touch of a button.
Home Mode: Press the button with the image of a house shown on it if you want only to activate the Home Mode.
Panic function: Press and hold the SOS button for more than two seconds to send an alert automatically to all your emergency contacts.
In this final step, you can test your alarm system to make sure that all the settings have been configured correctly.
Follow the instructions in the app to register your emergency contacts and residents.
Arm the alarm system via the app, Keypad or Key Fob.
Leave your home and wait at least one minute before you then trigger the alarm.
Test each accessory by triggering its function (e.g., open a door with a sensor attached to it or walk past a Motion Detector).
Check that you and all your emergency contacts receive an alarm message (text message, email or phone call) within one minute.
Tip:
Optionally turn off the siren during tests to avoid unnecessary noise. You can disable and enable the siren after selecting the Base Station in the home screen of the app.


